
PART – I
The Environment Setup
The scope of this tutorial is to set up a basic environment for your application to run. For building a REST API from scratch, please go to Part -2 of this post.
Table of Contents
- Install homebrew
- Installing Java
- Download Eclipse IDE
- Setting up Apache Tomcat server
- Creating a dynamic web project
- Configuring JAVAX framework
- Creating a “hello world” web service
Install homebrew – Homebrew is one of the easiest and flexible way to install and manage unix tools and packages. Open your command prompt and paste the following snippet. This will install homebrew in your system.
/bin/bash -c "$(curl -fsSL https://raw.githubusercontent.com/Homebrew/install/master/install.sh)"Make sure brew is installed by doing a brew – v

Download Eclipse IDE Java EE version from this link and choose according to your systems specifications.
https://www.eclipse.org/downloads/packages/release/neon/3/eclipse-ide-java-ee-developers
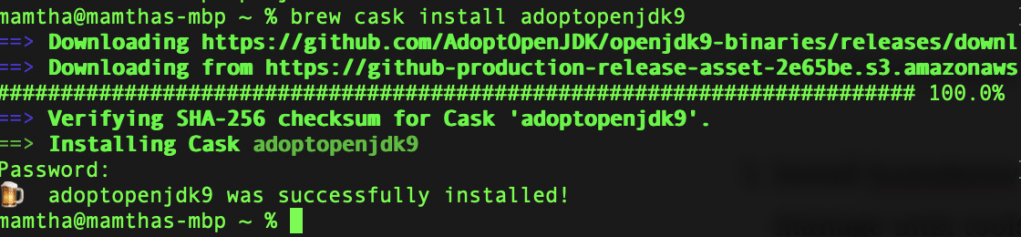
Installing java using brew command : brew cask install adoptopenjdk9
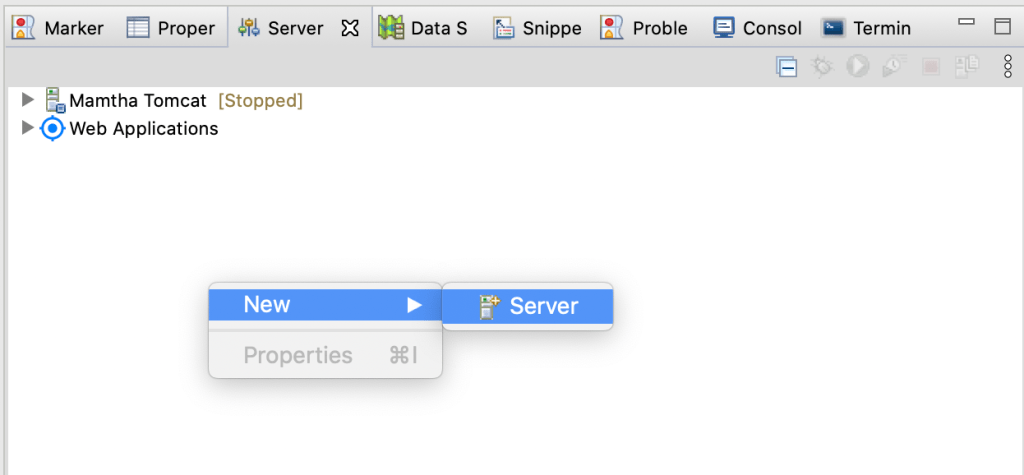
Next, we need a sever where our application has to run. So, let us download tomcat server from this link https://tomcat.apache.org/download-90.cgi
Download the tar.gz file and then go to your Eclipse IDE and click on the Server tab of the perspective window -> right click -> new -> Server
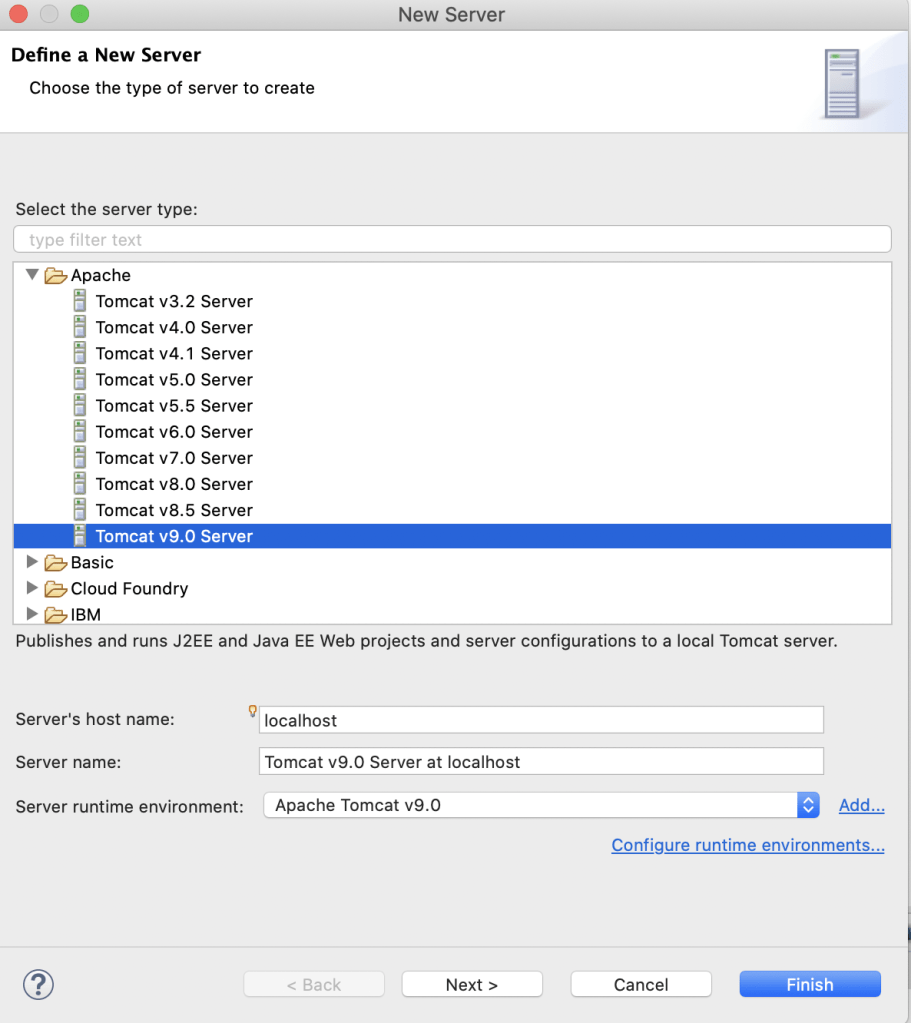
You will see the below window. Now you have to define a new server. Select the tomcat version that you have downloaded and click on Next.
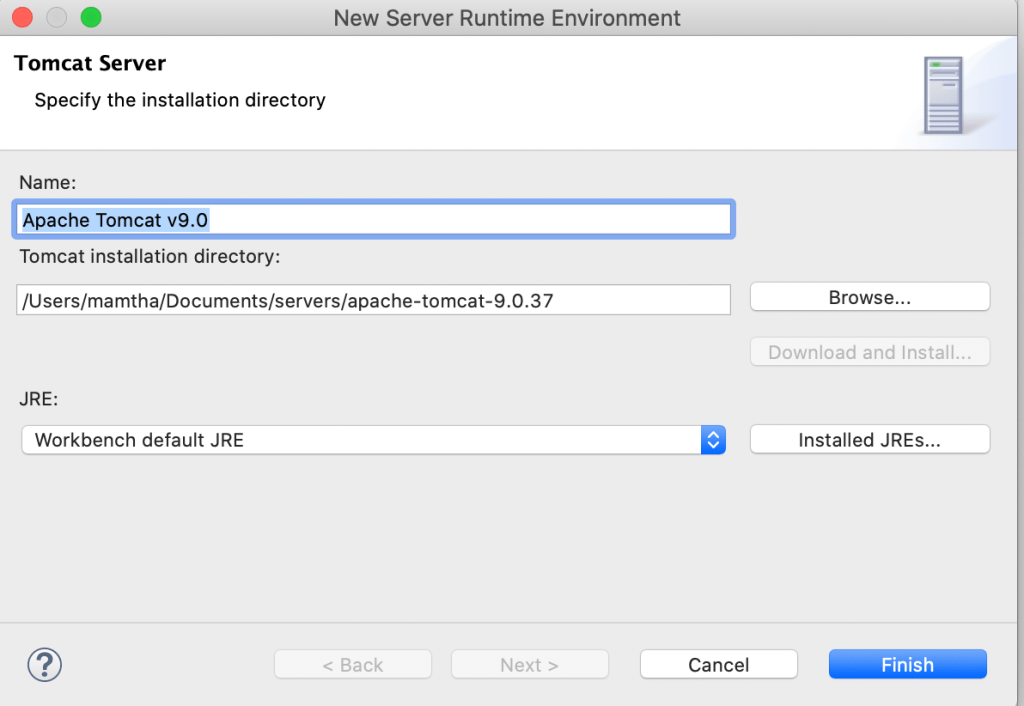
Next, you have to provide the path of the tomcat installation directory. Browse from your system to the tomcat folder and then click Finish.
Now, lets check whether your server is running or not!
You will see your server in a stopped state after the above configuration. I have named my sever Mamtha Tomcat as shown in the highlight. Right click on it and Start the server.
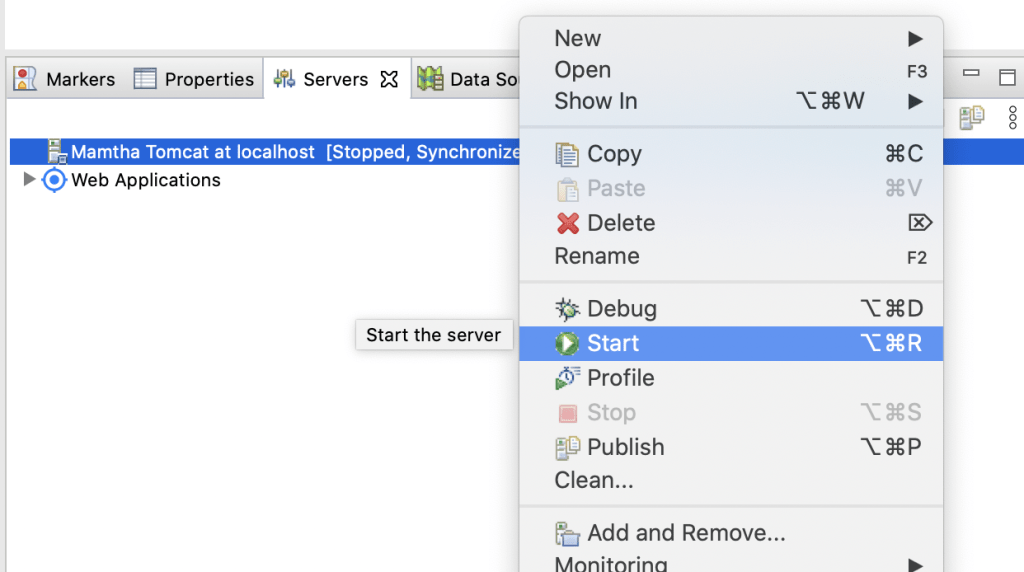
You should see that your server has gone from stopped to started state. Great! Now your server is up and running!
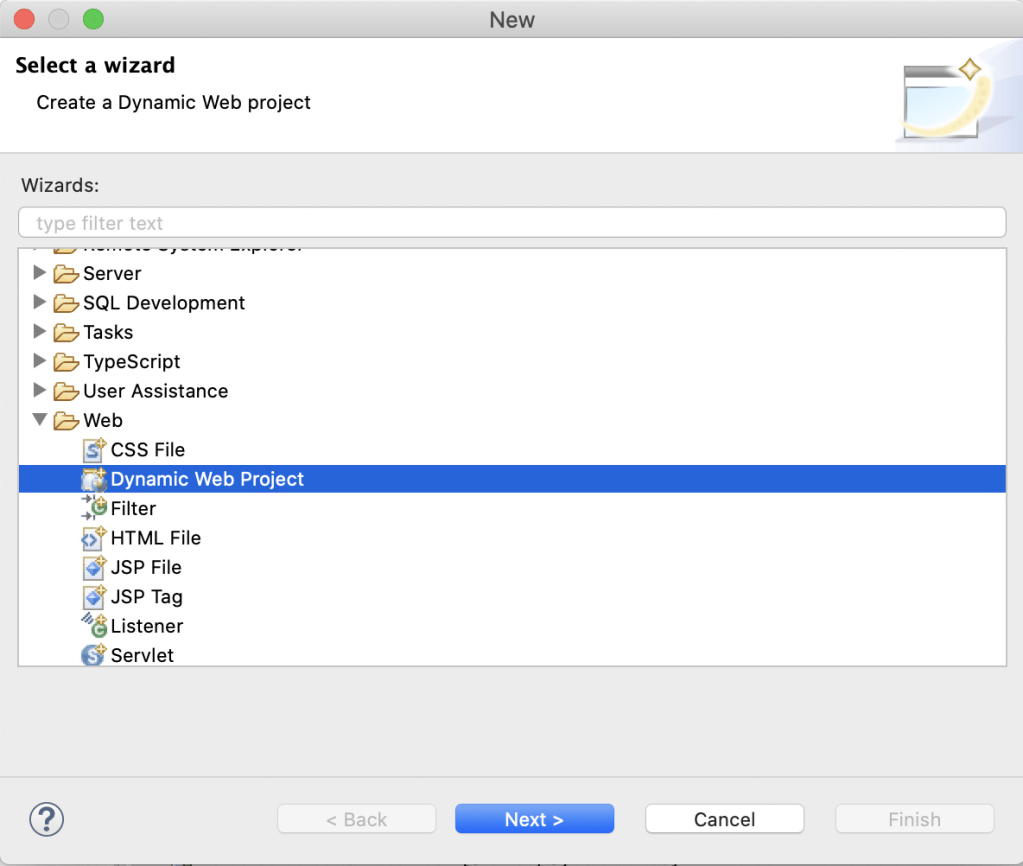
Now, it’s time to create your dynamic web application. Go to new –>Web–> Dynamic Web Project
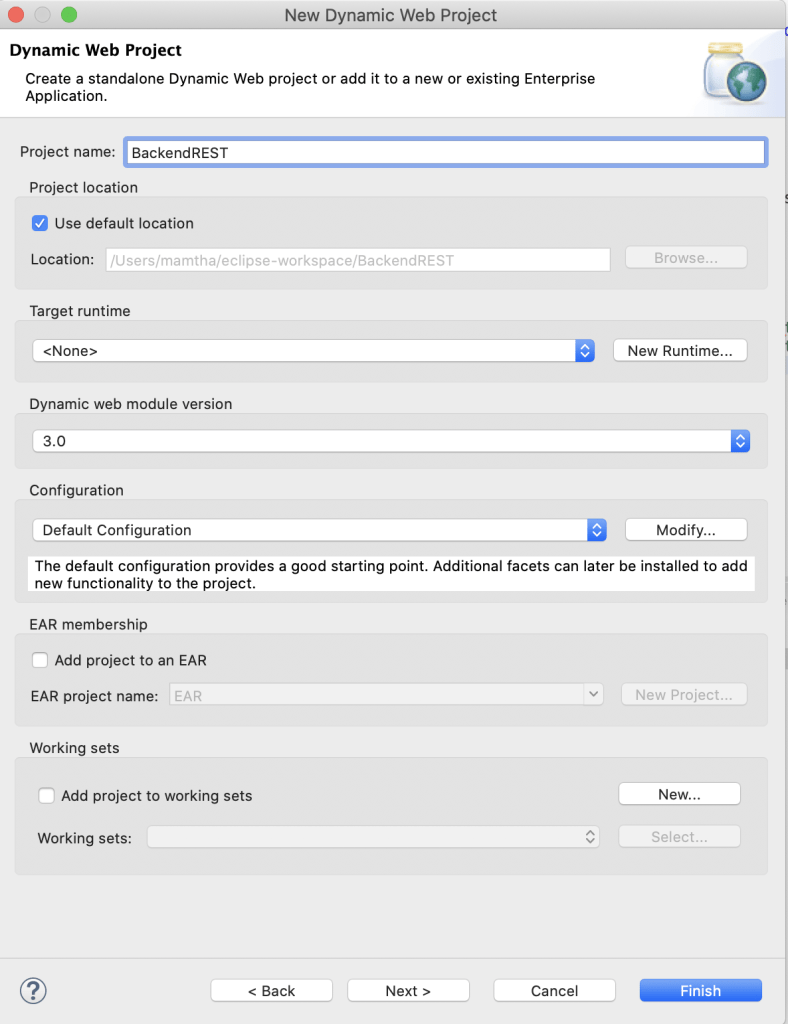
Name the project as BackendREST , save it in your eclipse workspace and click finish.
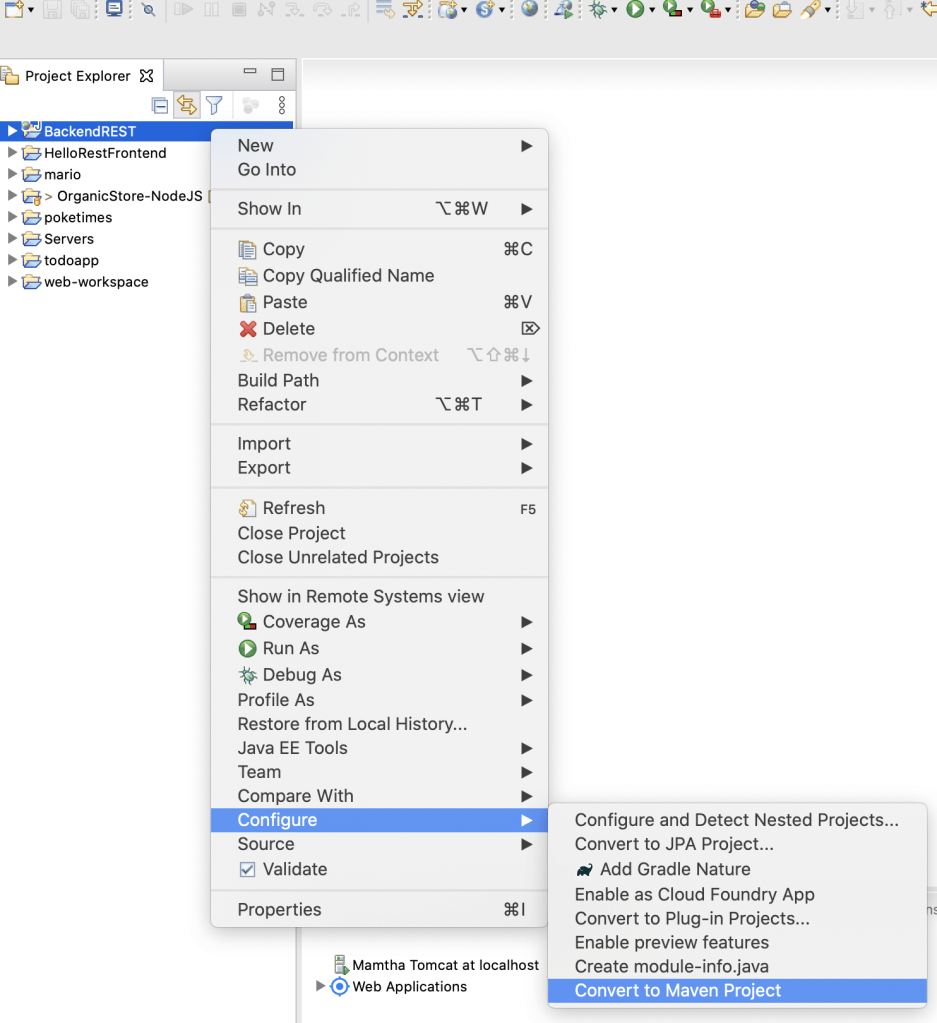
Now that you created a dynamic web project, let’s convert it to a Maven project for better dependency management.
Right click on the project folder (BackendREST) –> Configure –> Convert to Maven Project
Next, in the create new pom.xml wizard, leave all the settings as default and click finish.
To develop Restful Web Services in Java, we need Jersey framework dependency. So lets add this piece of code in the dependencies section in your pom.xml
<dependencies>
    <dependency>
        <groupId>org.glassfish.jersey.containers</groupId>
        <artifactId>jersey-container-servlet</artifactId>
        <version>2.25.1</version>
    </dependency>
</dependencies>
At this point your pom.xml should look something like this. The versions of maven may look different for you if you are using latest or older versions of jdk
<project xmlns="http://maven.apache.org/POM/4.0.0" xmlns:xsi="http://www.w3.org/2001/XMLSchema-instance" xsi:schemaLocation="http://maven.apache.org/POM/4.0.0 https://maven.apache.org/xsd/maven-4.0.0.xsd">
  <modelVersion>4.0.0</modelVersion>
  <groupId>BackendREST</groupId>
  <artifactId>BackendREST</artifactId>
  <version>0.0.1-SNAPSHOT</version>
  <packaging>war</packaging>
  <dependencies>
    <dependency>
        <groupId>org.glassfish.jersey.containers</groupId>
        <artifactId>jersey-container-servlet</artifactId>
        <version>2.25.1</version>
    </dependency>
  </dependencies>
  <build>
    <sourceDirectory>src</sourceDirectory>
    <plugins>
      <plugin>
        <artifactId>maven-compiler-plugin</artifactId>
        <version>3.8.1</version>
        <configuration>
          <source>1.8</source>
          <target>1.8</target>
        </configuration>
      </plugin>
      <plugin>
        <artifactId>maven-war-plugin</artifactId>
        <version>3.2.3</version>
        <configuration>
          <warSourceDirectory>WebContent</warSourceDirectory>
        </configuration>
      </plugin>
    </plugins>
  </build>
</project>
Hoping that all the pre requisites are successfully setup, let us start with building our backend and check whether everything is working.
Create a new package: Go to Java Resources –> right click on src folder –> new –> package
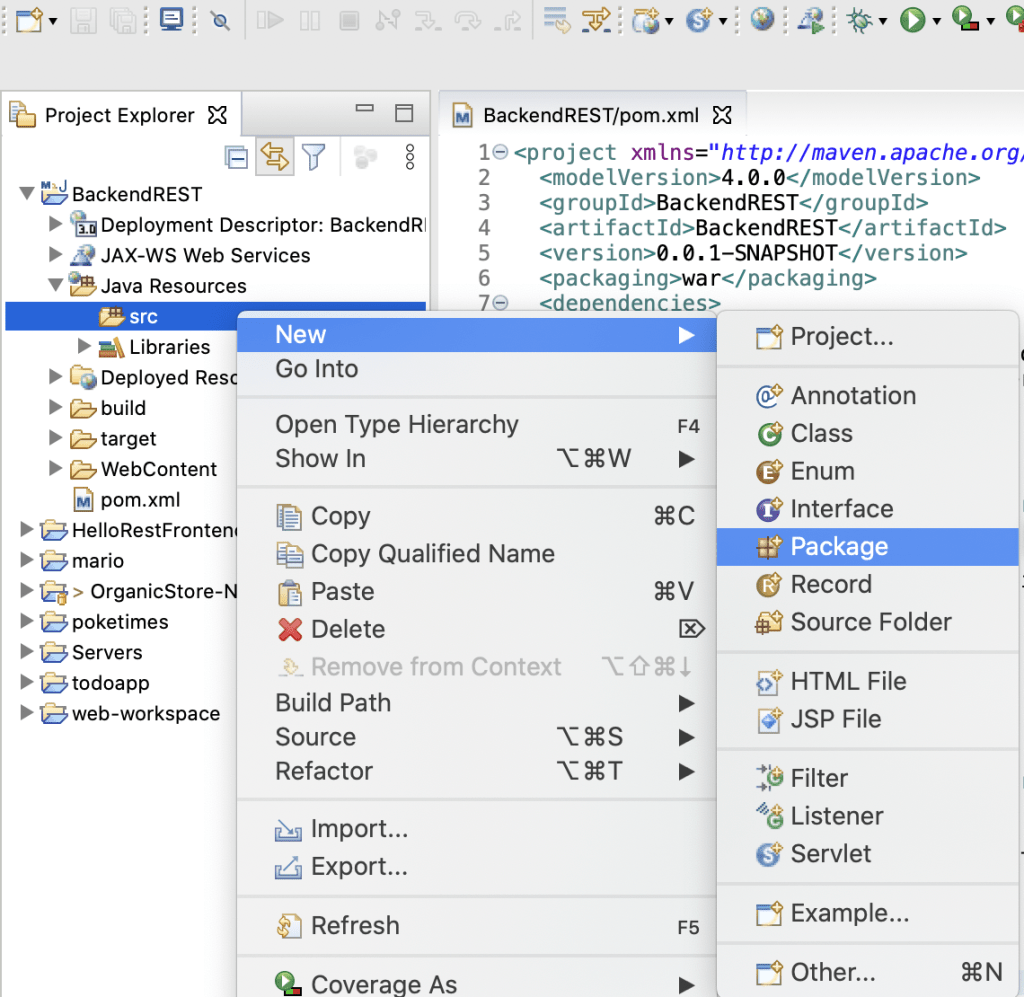
Give a name to your package. I am naming it com.example.backend
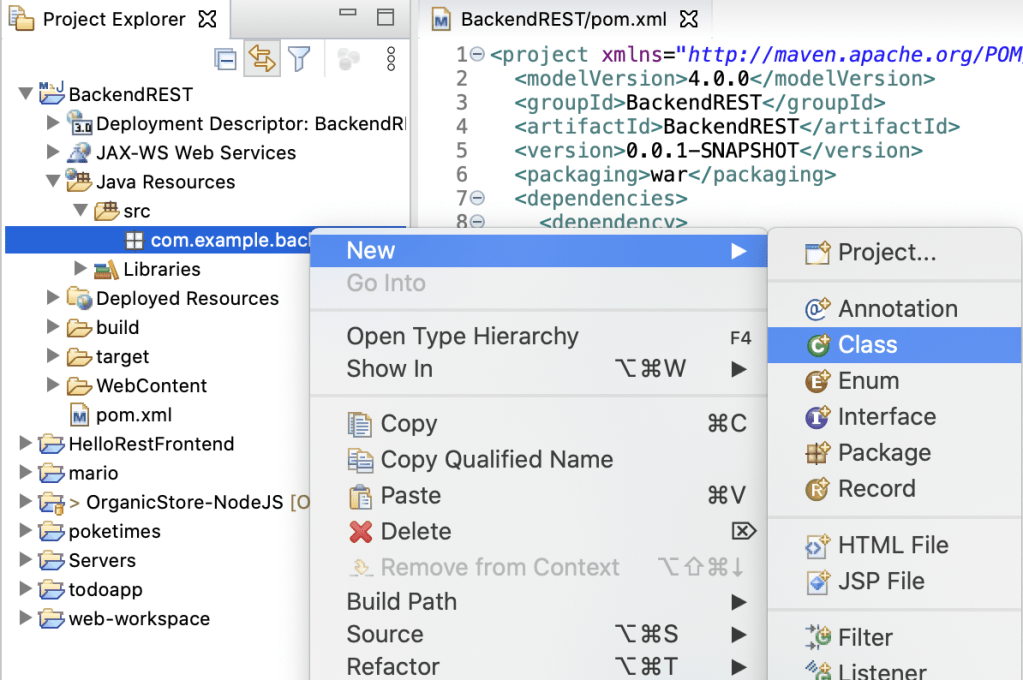
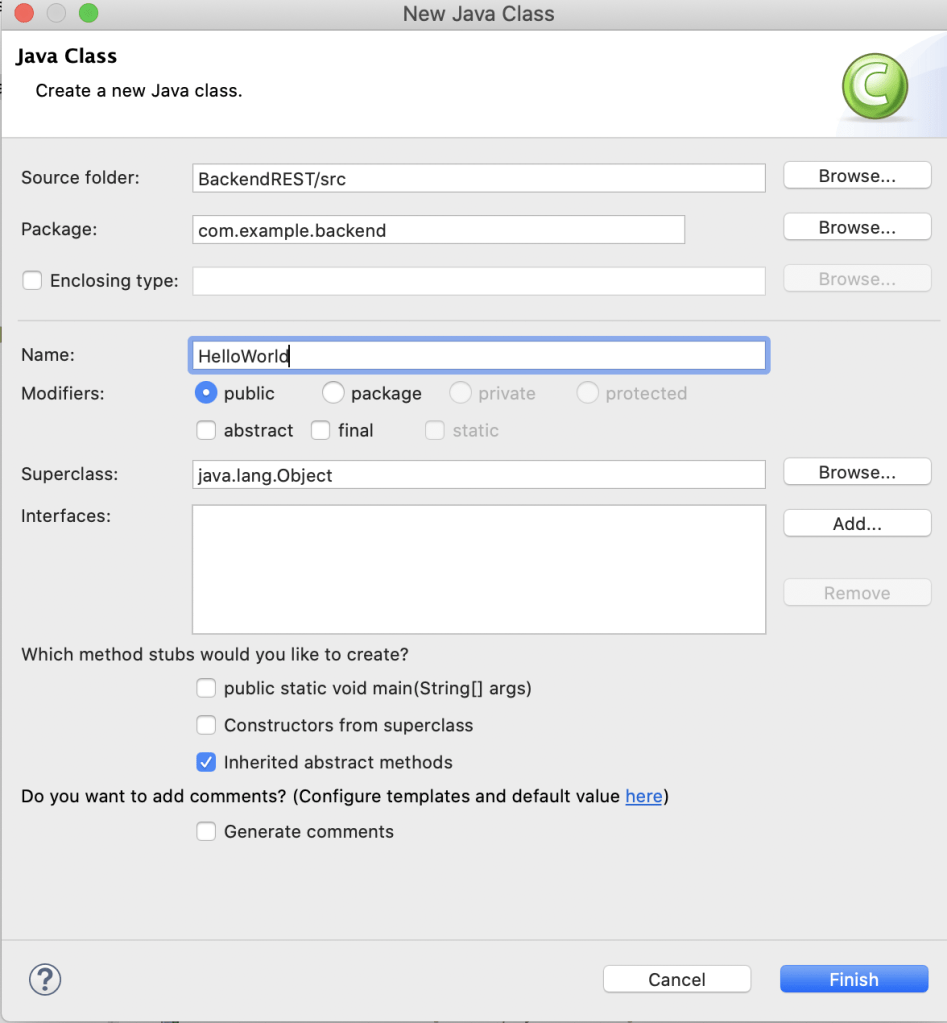
Now create a class in the package com.example.com
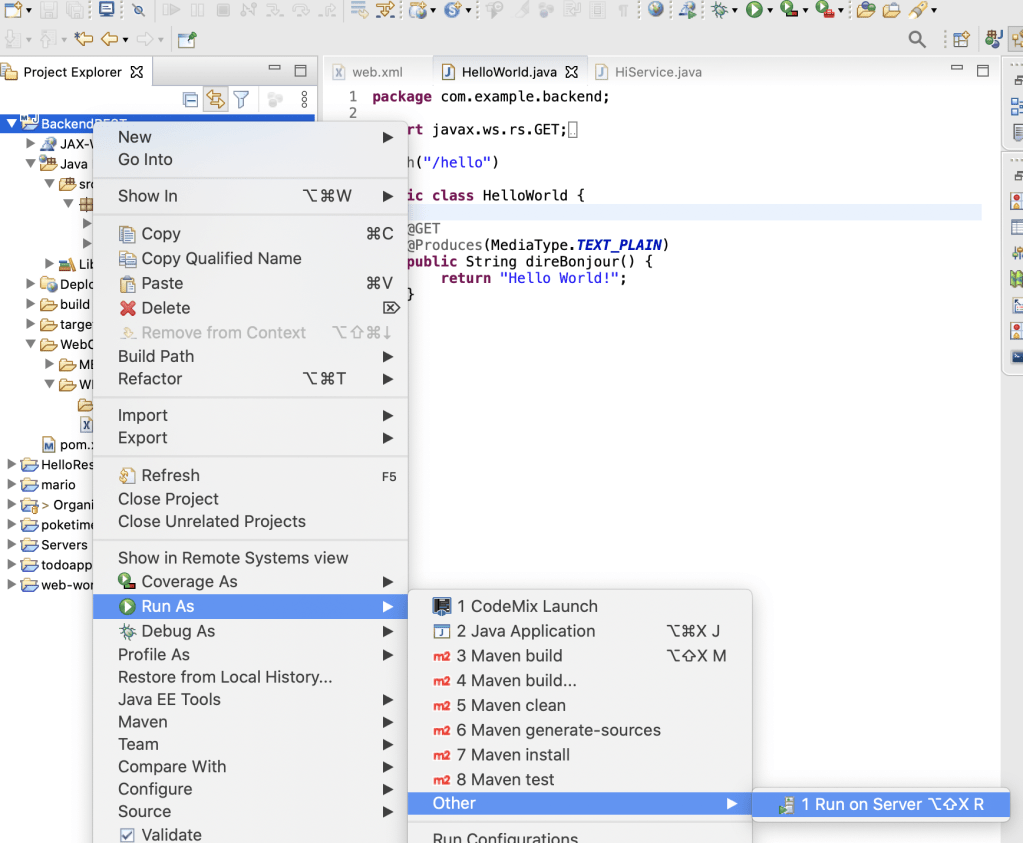
Our goal here is to return a simple “Hello World! ” text on our browser when we make a http get request to our tomcat server which is running on our localhost (step number 5).
In your HelloWorld.java class paste the below code and save.
package com.example.backend;

import javax.ws.rs.GET;
import javax.ws.rs.Path;
import javax.ws.rs.Produces;
import javax.ws.rs.core.MediaType;

@Path("/hello")

public class HelloWorld {

	@GET
    @Produces(MediaType.TEXT_PLAIN)
    public String direBonjour() {
        return "Hello World!";
    }

}
Create a web.xml file in Web Content –> WEB-INF folder.
web.xml file is a controller for your web application. Here we specify the servlet, filter policies, resource/servlet mapping.
servlet — we are using is the jersey servlet container (Do not forget to mention your package name in param-value within the servlet tag)
filters – such as CORS filter, allowed origins, allowed methods, allowed headers, exposed headers, etc.,
After creating the web.xml file paste the below code and save.
<?xml version="1.0" encoding="UTF-8"?>
<web-app xmlns:xsi="http://www.w3.org/2001/XMLSchema-instance" xmlns="http://xmlns.jcp.org/xml/ns/javaee" xsi:schemaLocation="http://xmlns.jcp.org/xml/ns/javaee http://xmlns.jcp.org/xml/ns/javaee/web-app_4_0.xsd" id="WebApp_ID" version="4.0">
  <display-name>HelloREST</display-name>
  <welcome-file-list>
    <welcome-file>index.html</welcome-file>
    <welcome-file>index.htm</welcome-file>
    <welcome-file>index.jsp</welcome-file>
    <welcome-file>default.html</welcome-file>
    <welcome-file>default.htm</welcome-file>
    <welcome-file>default.jsp</welcome-file>
  </welcome-file-list>

  <servlet>
    <servlet-name>Jersey REST Service</servlet-name>
    <servlet-class>org.glassfish.jersey.servlet.ServletContainer</servlet-class>
    <init-param>
        <param-name>jersey.config.server.provider.packages</param-name>
        <param-value>com.example.backend</param-value>
    </init-param>
    <load-on-startup>1</load-on-startup>
</servlet>

<servlet-mapping>
    <servlet-name>Jersey REST Service</servlet-name>
    <url-pattern>/rest/*</url-pattern>
</servlet-mapping>

<filter>
    <filter-name>CorsFilter</filter-name>
    <filter-class>org.apache.catalina.filters.CorsFilter</filter-class>
    <init-param>
        <param-name>cors.allowed.origins</param-name>
        <param-value>*</param-value>
    </init-param>
    <init-param>
        <param-name>cors.allowed.methods</param-name>
        <param-value>GET,POST,HEAD,OPTIONS,PUT</param-value>
    </init-param>
    <init-param>
        <param-name>cors.allowed.headers</param-name>
        <param-value>Content-Type,X-Requested-With,Accept,Accept-Encoding,Accept-Language,Origin,Access-Control-Request-Method,Access-Control-Request-Headers,Connection,Host,authorization</param-value>
    </init-param>
    <init-param>
        <param-name>cors.exposed.headers</param-name>
        <param-value>Access-Control-Allow-Origin,Access-Control-Allow-Credentials</param-value>
    </init-param>
</filter>
<filter-mapping>
    <filter-name>CorsFilter</filter-name>
    <url-pattern>/*</url-pattern>
</filter-mapping>

</web-app>
Once again make sure your Tomcat Server is running. (Right click on server and start it again if it’s not running see how in step 5.
Now, make sure you save everything. Right click on the project folder BackendREST –>Run as –>Other –> Run on server
Select the tomcat server we created in step 5. Now type in the url to access the resource from your browser. (BackendREST is the project name/rest – as specified in the web.xml / hello -is the URI mentioned in the HelloWorld.java class
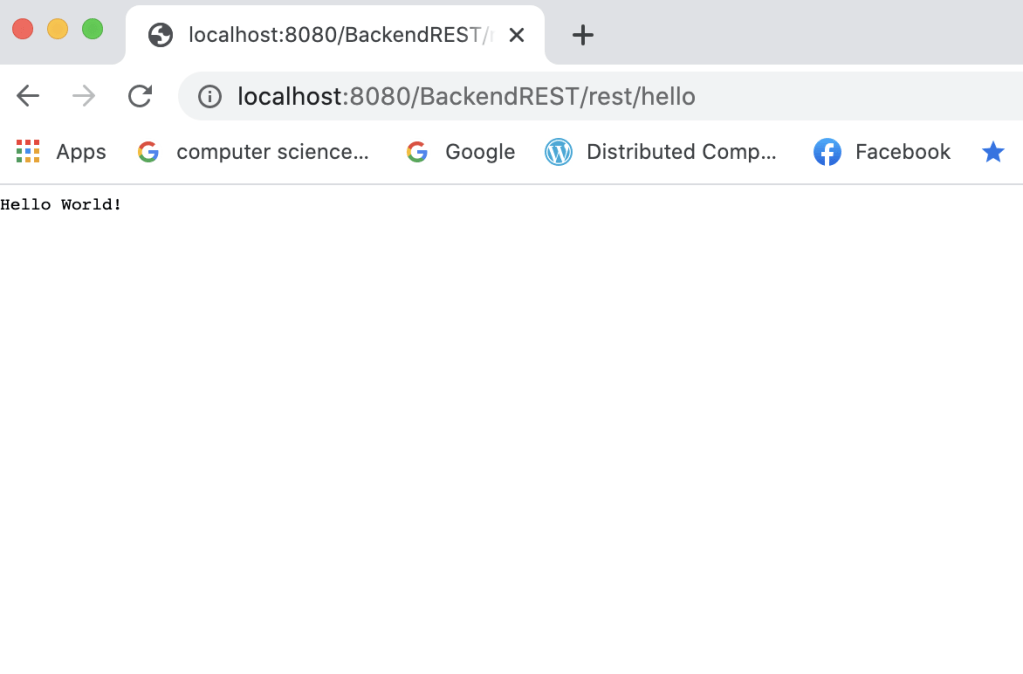
http://localhost:8080/BackendREST/rest/hello
You should see Hello World! in your browser
Now, that your environment is setup. Let’s deep dive into the real part! concept and coding. Go to Part 2 “A definitive guide for web service development – PART II” of this tutorial. Feel free to comment in the feedback section if you have any questions regarding this post. Thanks for reading!
